Chapter 20 · Part 3
Import Sub-Accounts (CSV)
Creating sub-accounts one at a time is fine for a few — but if you have many, upload them all at once with a CSV file. Each row in the file becomes one sub-account.
The CSV column order
Go to User Profile → Manage Sub Account → Import Sub. Your file needs six columns, in this exact order — and no header row.
| Column | Field | Required |
|---|---|---|
| A | Username — letters, numbers, -, _ only · must be unique | Yes |
| B | Password — must not match the username | Yes |
| C | Email address | Yes |
| D | Daily limit — use 0 for unlimited | Yes |
| E | Monthly limit — use 0 for unlimited | Yes |
| F | Message Control — type YES or NO | Yes |
A sample file looks like this — one sub-account per line:
# username,password,email,daily,monthly,message-control
john_sub,pass123,john@company.com,100,3000,NO
mary_sub,mary456,mary@company.com,50,1500,YES
sales01,sales789,sales@company.com,0,0,NO
Uploading the file
- 1
Prepare the file
Fill the six columns above, starting data on row 1 (no header). Save as CSV (comma-separated, UTF-8). New to this? See Create CSV in Excel and Export Excel to CSV.
- 2
Choose & import
Click Choose File, select your
.csv, then click Import CSV. You can also Download Sample CSV from the page to start from a ready-made template.
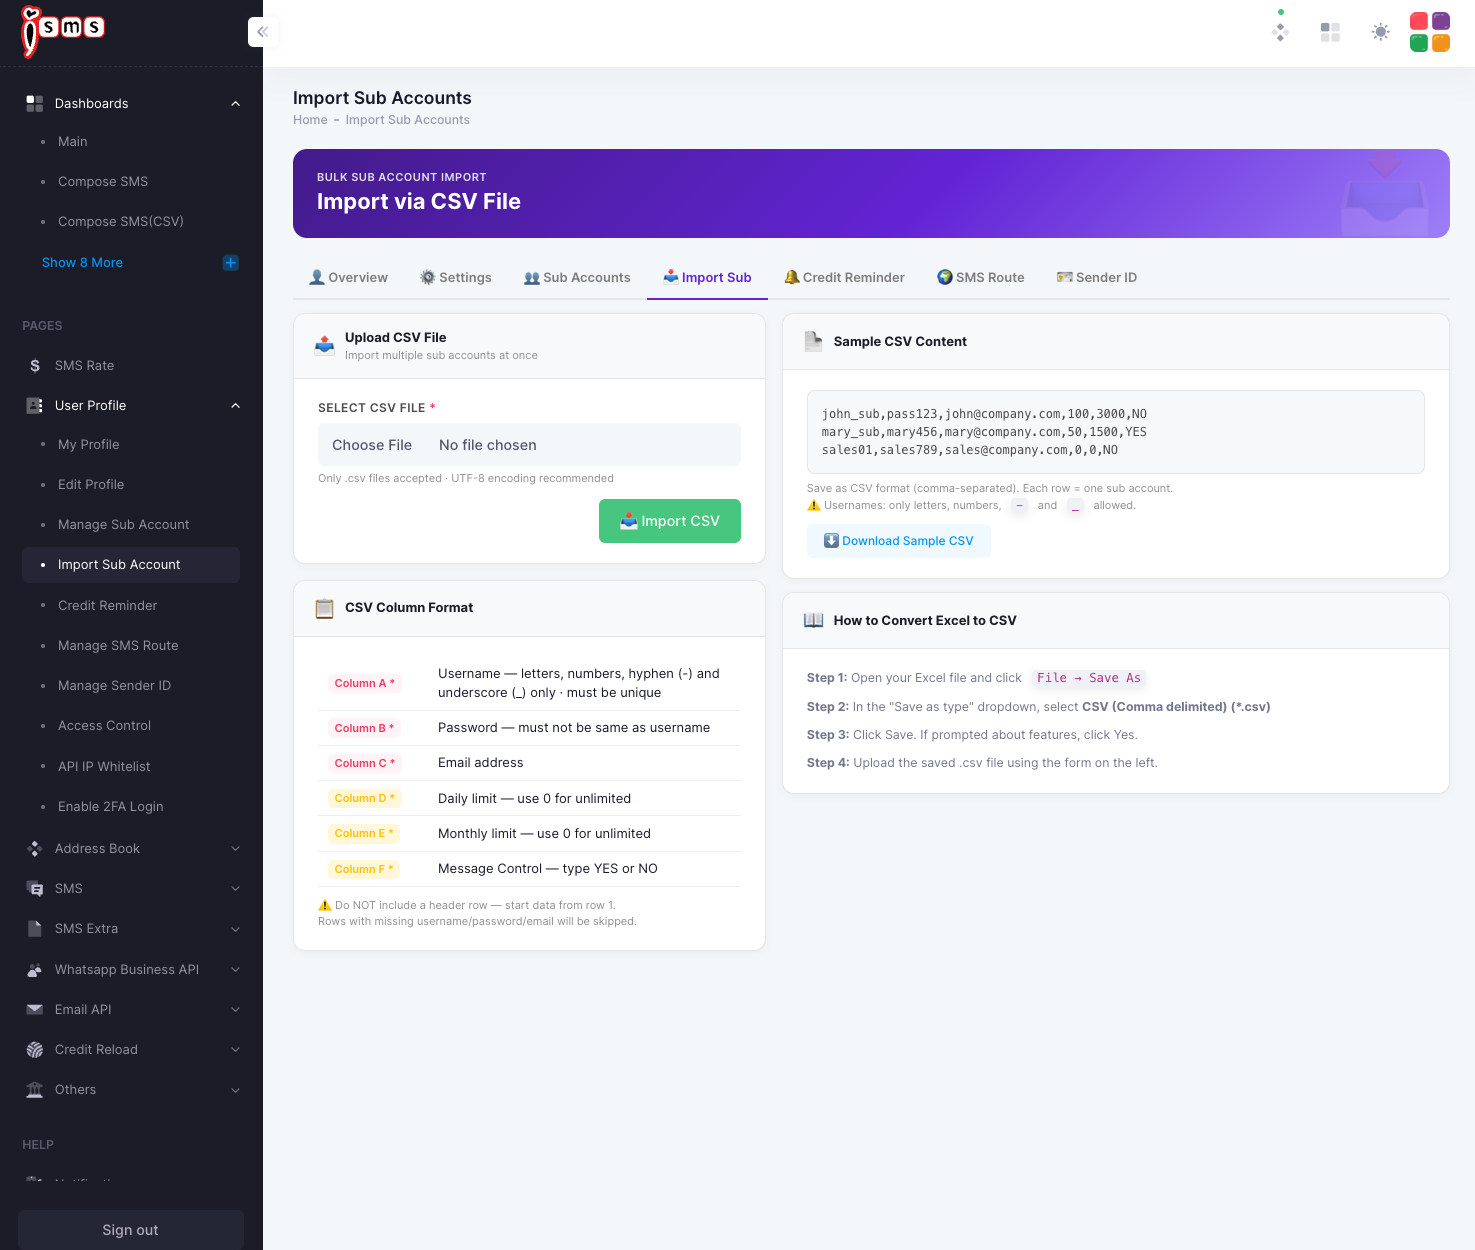
Two things to watch: do not include a header row — start your data on row 1; and any row missing a username, password, or email is skipped.
Need help?
Our team is happy to assist with anything in this guide. Contact us →