Chapter 19 · Part 3
Manage Sub-Accounts
Give team members or clients their own login under your main account — each with its own sending limits and permissions. You stay in control of credits while they send on their own.
Adding a sub-account
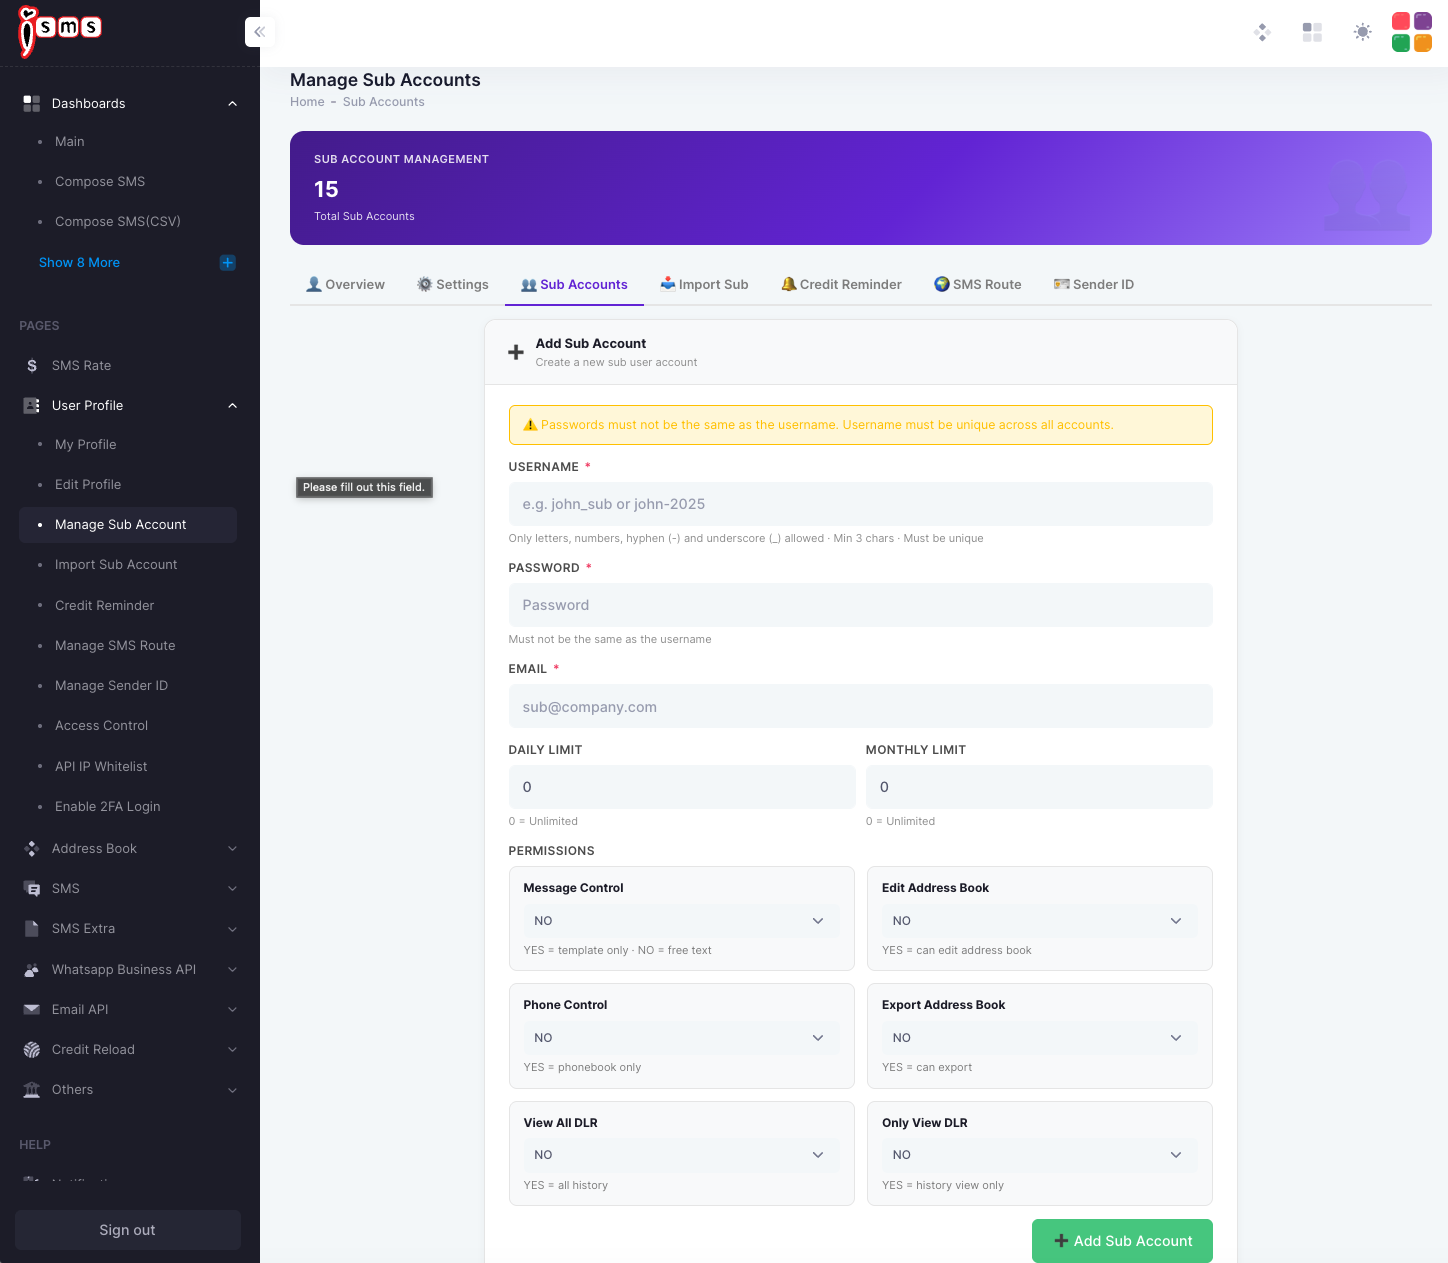
Go to User Profile → Manage Sub Account and open the Sub Accounts tab. Fill in the form to create a new sub-user.
- 1
Username
Letters, numbers, hyphen (
-) and underscore (_) only, at least 3 characters, and unique across all accounts. - 2
Password
Set a password — it must not be the same as the username.
- 3
Email
Enter the sub-user’s email address.
- 4
Daily & monthly limits
Cap how many SMS this sub-account can send. Enter 0 for unlimited.
- 5
Permissions
Decide what the sub-account can do (see the reference below), then click Add Sub Account.
Permissions reference
Each permission is a simple YES / NO toggle:
- Message ControlYES = template only · NO = free text.
- Phone ControlYES = phonebook numbers only.
- Edit Address BookYES = can edit the address book.
- Export Address BookYES = can export contacts.
- View All DLRYES = can see all delivery history.
- Only View DLRYES = history view only.
Have a lot of sub-accounts to add? Create them all at once with Import Sub-Accounts (CSV).
Need help?
Our team is happy to assist with anything in this guide. Contact us →