Chapter 24 · Part 3
Manage SMS Sender ID
A Sender ID is the name your recipients see as the message sender — for example your brand name instead of a number. Once a Sender ID has been registered and approved for your account, this is where you add it and switch it on.
Before you add one
Sender IDs aren’t created on the spot — each one is registered and approved with our team first. Once yours is approved, the steps below add it to your account and activate it.
How a Sender ID goes live
Approved with us
Registered & approved first
Add it here
Enter the approved name
Activate
Switch it on
Send abroad
Used on international routes
Your Sender IDs at a glance
Open Account → Manage Sender ID. The summary cards tally your IDs, and the My Sender IDs list shows each one’s status.
Add & activate a Sender ID
- 1
Enter your approved Sender ID
In the Add Sender ID box, type the Sender ID exactly as it was approved (for example
BRAND-2002) — up to 11 alphanumeric characters — then click Add Sender ID. It joins your My Sender IDs list. - 2
Verify it (numeric IDs only)
A numeric Sender ID must be confirmed by an SMS OTP before it can be used; it sits under Pending Verify until then. Approved text IDs already show as Verified.
- 3
Activate it
Click Activate next to the Sender ID to start sending under that name. Deactivate turns it off again, and the trash icon removes it from your account.
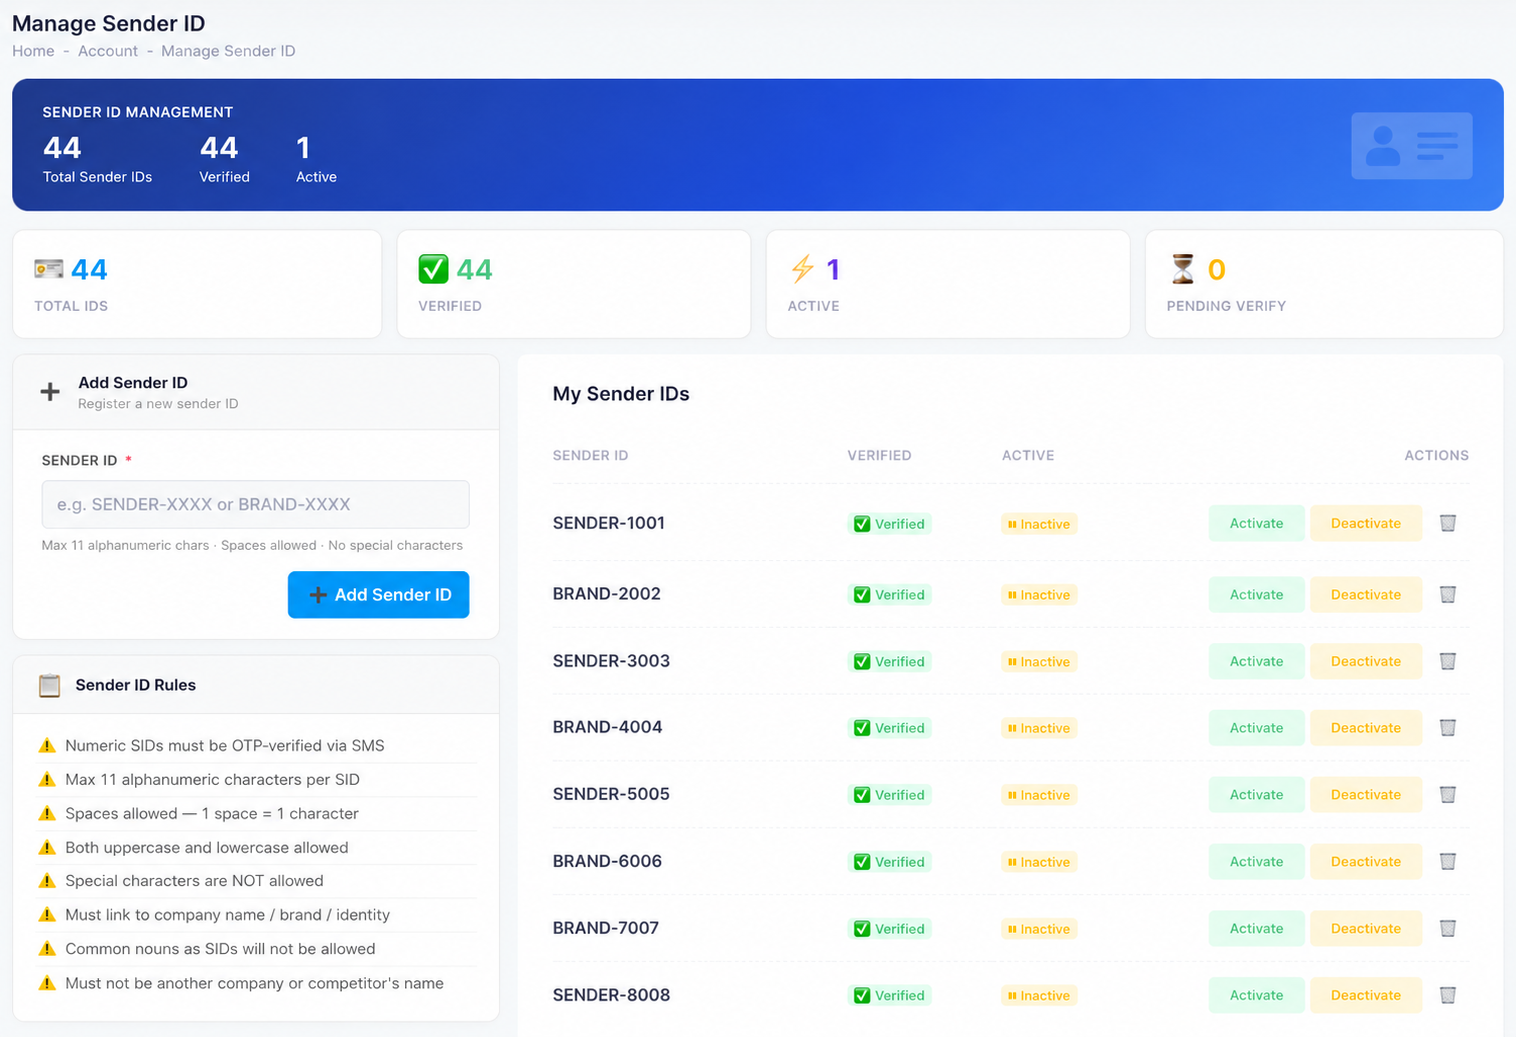
Sender ID rules
Approved IDs already meet these — but it helps to know why one might be rejected:
- Up to 11 alphanumeric charactersLetters and numbers only; both upper- and lower-case are fine.
- Spaces are allowedOne space counts as one of the 11 characters.
- No special charactersSymbols and punctuation aren’t permitted.
- Must represent your identityTied to your company name, brand, or identity.
- No generic or third-party namesCommon nouns, and any other company’s or a competitor’s name, are rejected.
- Numeric IDs need OTPA numeric Sender ID must be verified by SMS OTP.