Chapter 43 · Part 6
About Meta Messenger
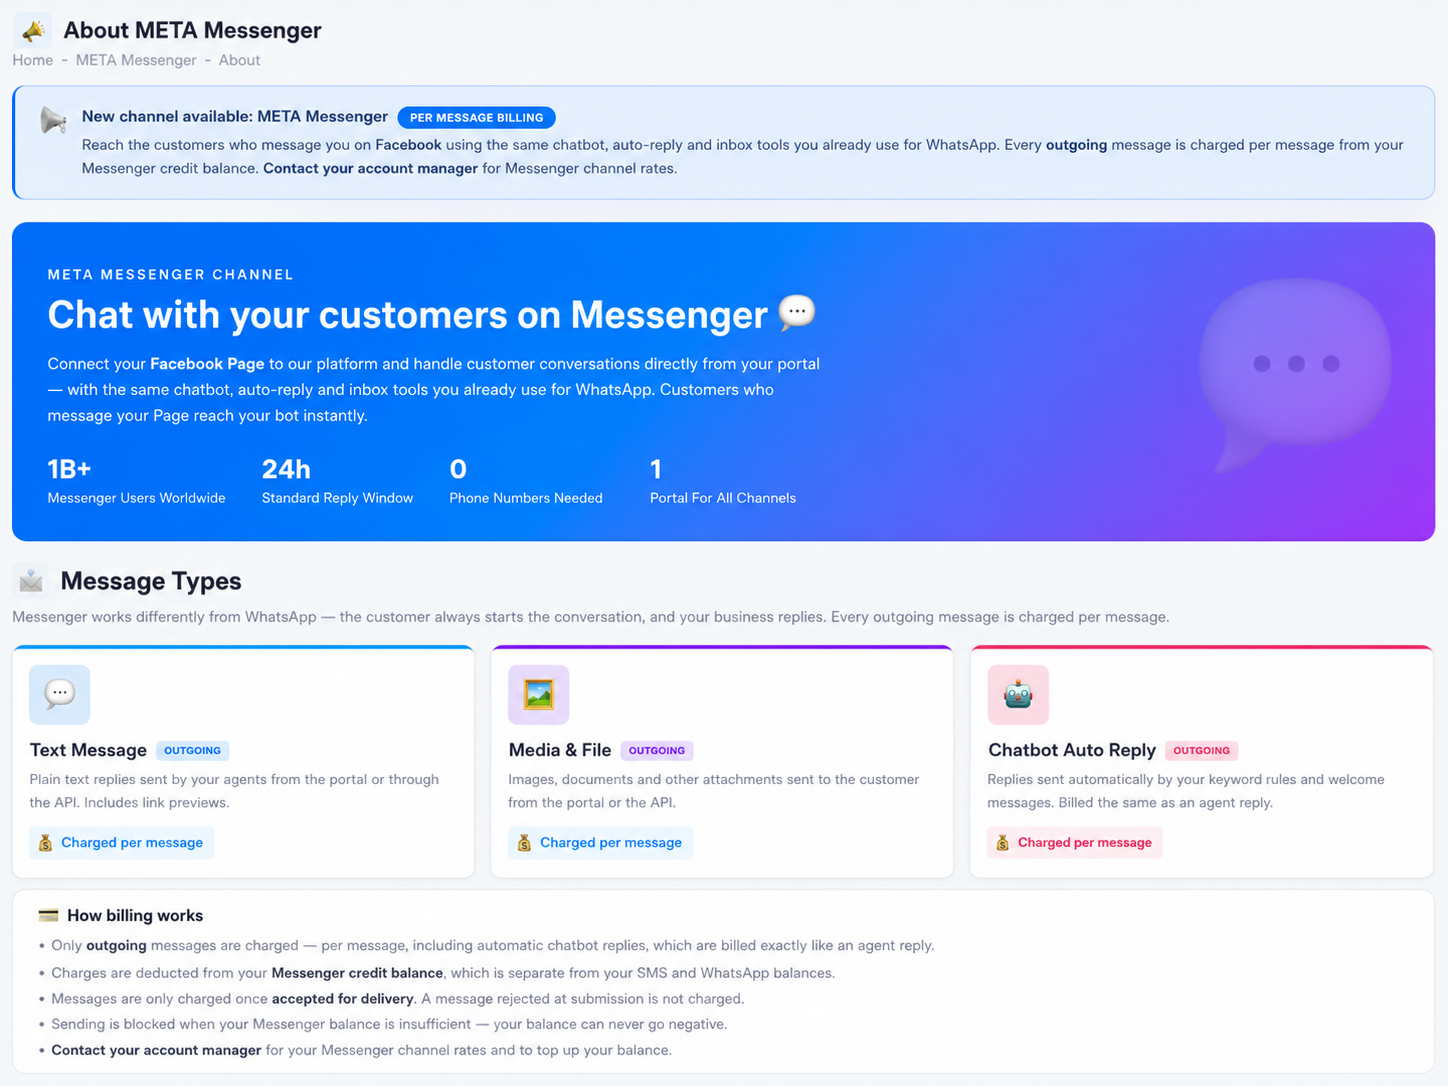
Chat with the customers who message you on Facebook — from the same portal, chatbot, auto-reply, and inbox tools you already use for WhatsApp. Connect your Facebook Page and customers who message it reach you instantly.
Why Messenger?
Messenger works differently from WhatsApp in one important way: the customer always starts the conversation by messaging your Facebook Page, and your business replies. There's no phone number involved — contacts are identified by their Facebook profile.
WhatsApp or Messenger — which channel for what?
The two channels complement each other: use WhatsApp for outbound reach, and Messenger to serve the customers who contact you on Facebook.
| WhatsApp Business API | META Messenger | |
|---|---|---|
| Identity | Customer phone number | Facebook profile — no phone number needed |
| Who starts | Business can broadcast via approved templates | Customer messages your Page first |
| Best for | Outbound campaigns, OTP, notifications | Customer service, chatbot support, Page enquiries |
| Billing | Charged per message | Charged per outgoing message |
Message types
All outgoing message types are charged per message:
Text message
Plain text replies sent by your agents from the portal or through the API, including link previews.
Media & file
Images, documents, and other attachments sent to the customer from the portal or the API.
Chatbot auto reply
Replies sent automatically by your keyword rules and welcome messages — billed the same as an agent reply.
How billing works
- Only outgoing messages are chargedPer message — including automatic chatbot replies, which are billed exactly like an agent reply. Incoming customer messages are free.
- A dedicated Messenger credit balanceCharges are deducted from your Messenger credit balance, which is separate from your SMS and WhatsApp balances.
- Charged only once accepted for deliveryA message rejected at submission is not charged.
- Your balance can never go negativeSending is blocked when your Messenger balance is insufficient — top up to resume.
What you get
Everything runs inside the portal you already use — no extra software needed:
Same chatbot & auto reply
Your keyword replies and welcome messages work on Messenger exactly like on WhatsApp — configure once, reply everywhere.
Unified inbox
Messenger conversations appear in your portal inbox alongside WhatsApp — one place for all customer chats.
No phone number required
Customers are identified by their Facebook profile, so you can serve people who never share a phone number with you.
Text, media & files
Send plain text, images, documents, and attachments — from the portal inbox or straight from the API.
Full reporting
Inbound and outbound logs, delivery status, daily and monthly reports — the same reporting you know from the WhatsApp channel.
Your Page stays yours
You only grant messaging permission — your Facebook Page remains fully under your ownership, and you can disconnect anytime.
How to get started
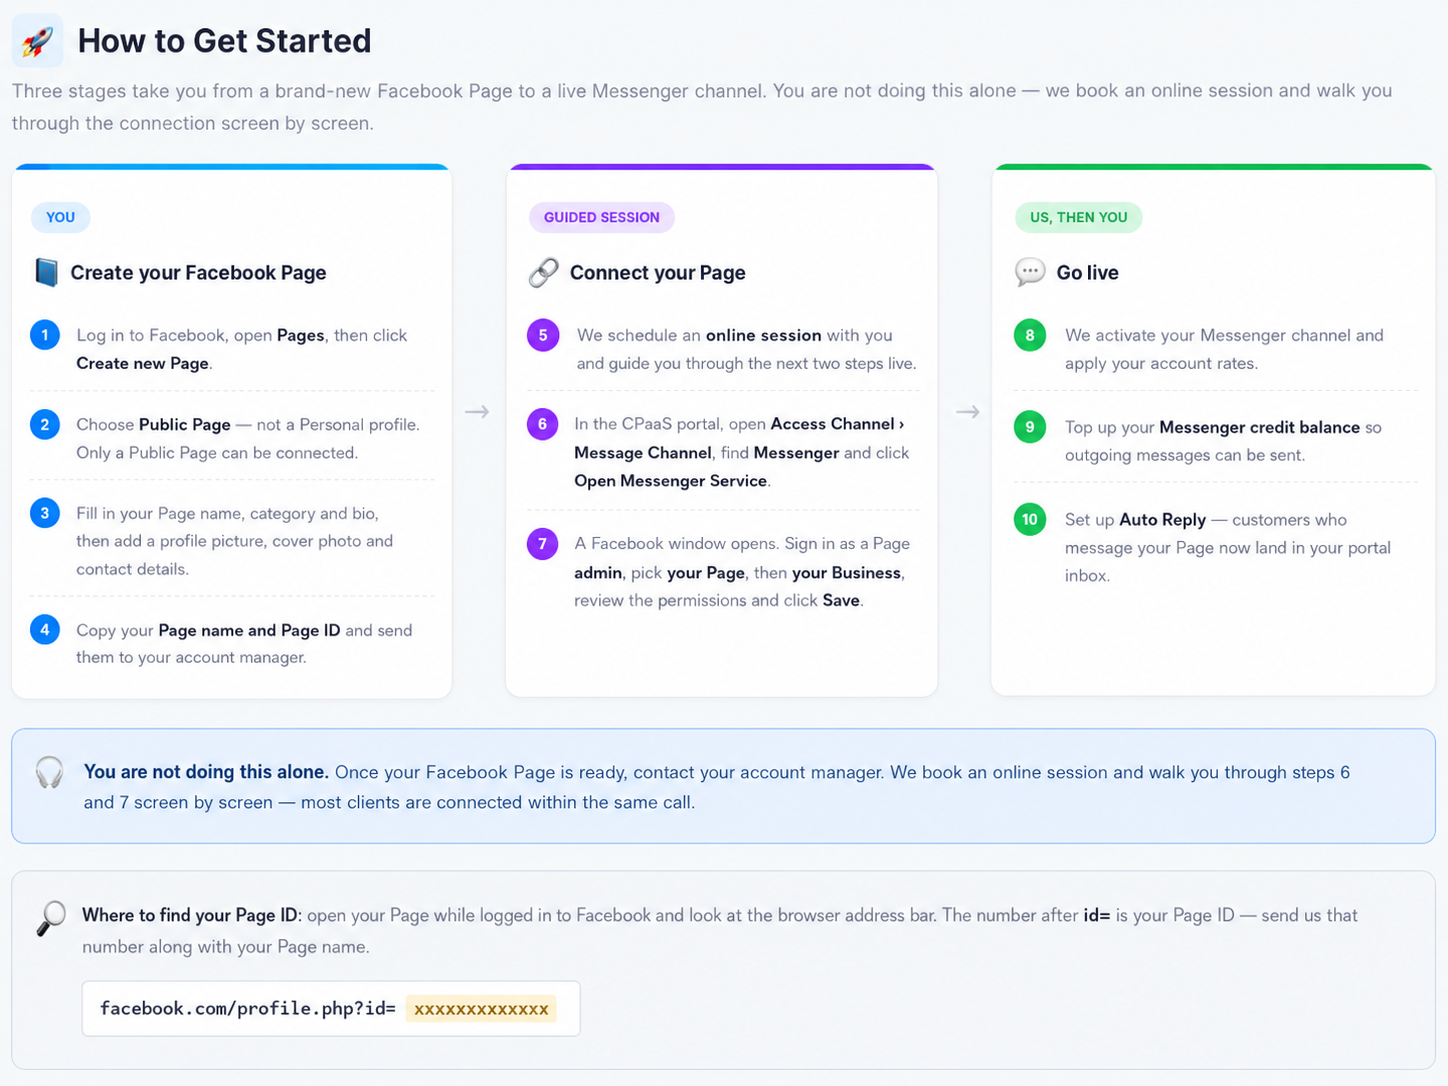
Three stages take you from a brand-new Facebook Page to a live Messenger channel — and you’re not doing it alone: we book an online session and walk you through the connection screen by screen.
From Facebook Page to live channel
Create your Page
A public Facebook Page
Connect it (guided)
Online session with us
We activate
Channel live, rates applied
Top up & go
Auto Reply catches every chat
- 1
Create your Facebook Page (you)
Log in to Facebook, open Pages, and click Create new Page. Choose a Public Page — not a personal profile; only a Public Page can be connected. Fill in your Page name, category, and bio, then add a profile picture, cover photo, and contact details.
- 2
Send us your Page name and Page ID
Open your Page while logged in to Facebook and look at the browser address bar — the number after
id=is your Page ID:facebook.com/profile.php?id=xxxxxxxxxxxxxSend that number along with your Page name to your account manager.
- 3
Connect your Page (guided session)
We schedule an online session with you and guide you through the connection live: in the CPaaS portal, open Access Channel › Message Channel, find Messenger, and click Open Messenger Service. A Facebook window opens — sign in as a Page admin, pick your Page, then your Business, review the permissions, and click Save. Most clients are connected within the same call.
- 4
Go live (us, then you)
We activate your Messenger channel and apply your account rates. Then top up your Messenger credit balance so outgoing messages can be sent, and set up Auto Reply — customers who message your Page now land in your portal inbox.