Chapter 47 · Part 6
Messenger CSV Send
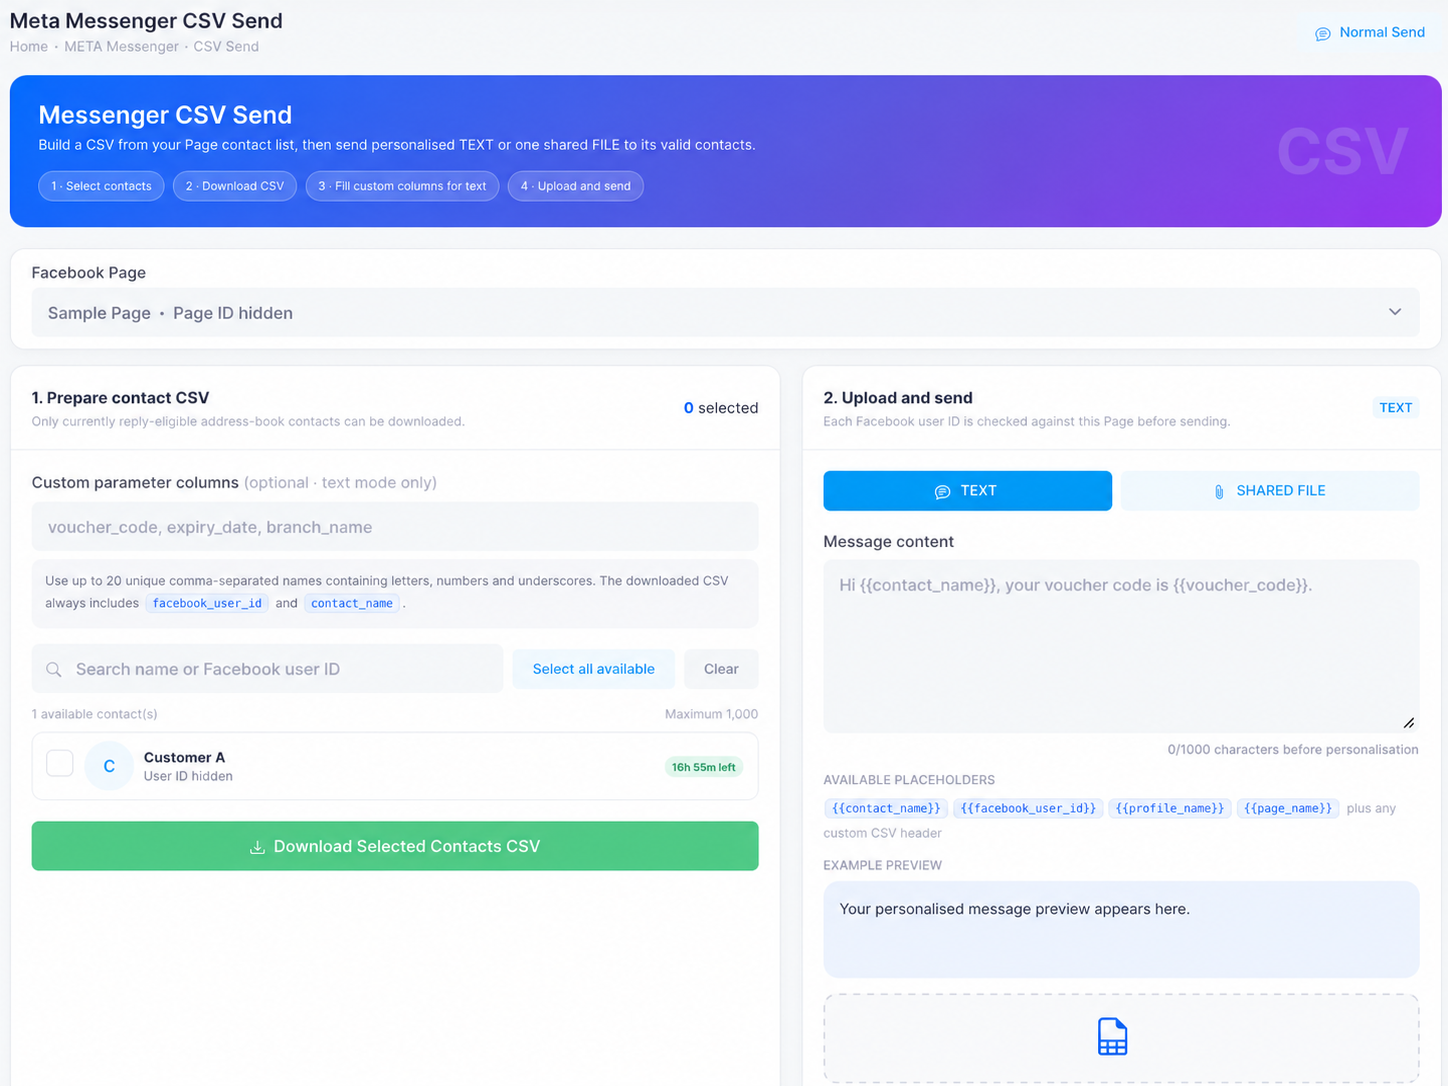
Build a CSV from your Page’s contact list, fill in your own columns, and send personalised text — or one shared file — to up to 1,000 contacts at once.
How it flows
Four steps, one send
Select contacts
Reply-eligible only
Download CSV
With your custom columns
Fill the columns
Per-contact values
Upload & send
Personalised per contact
Prepare the contact CSV
- 1
Pick your Page and contacts
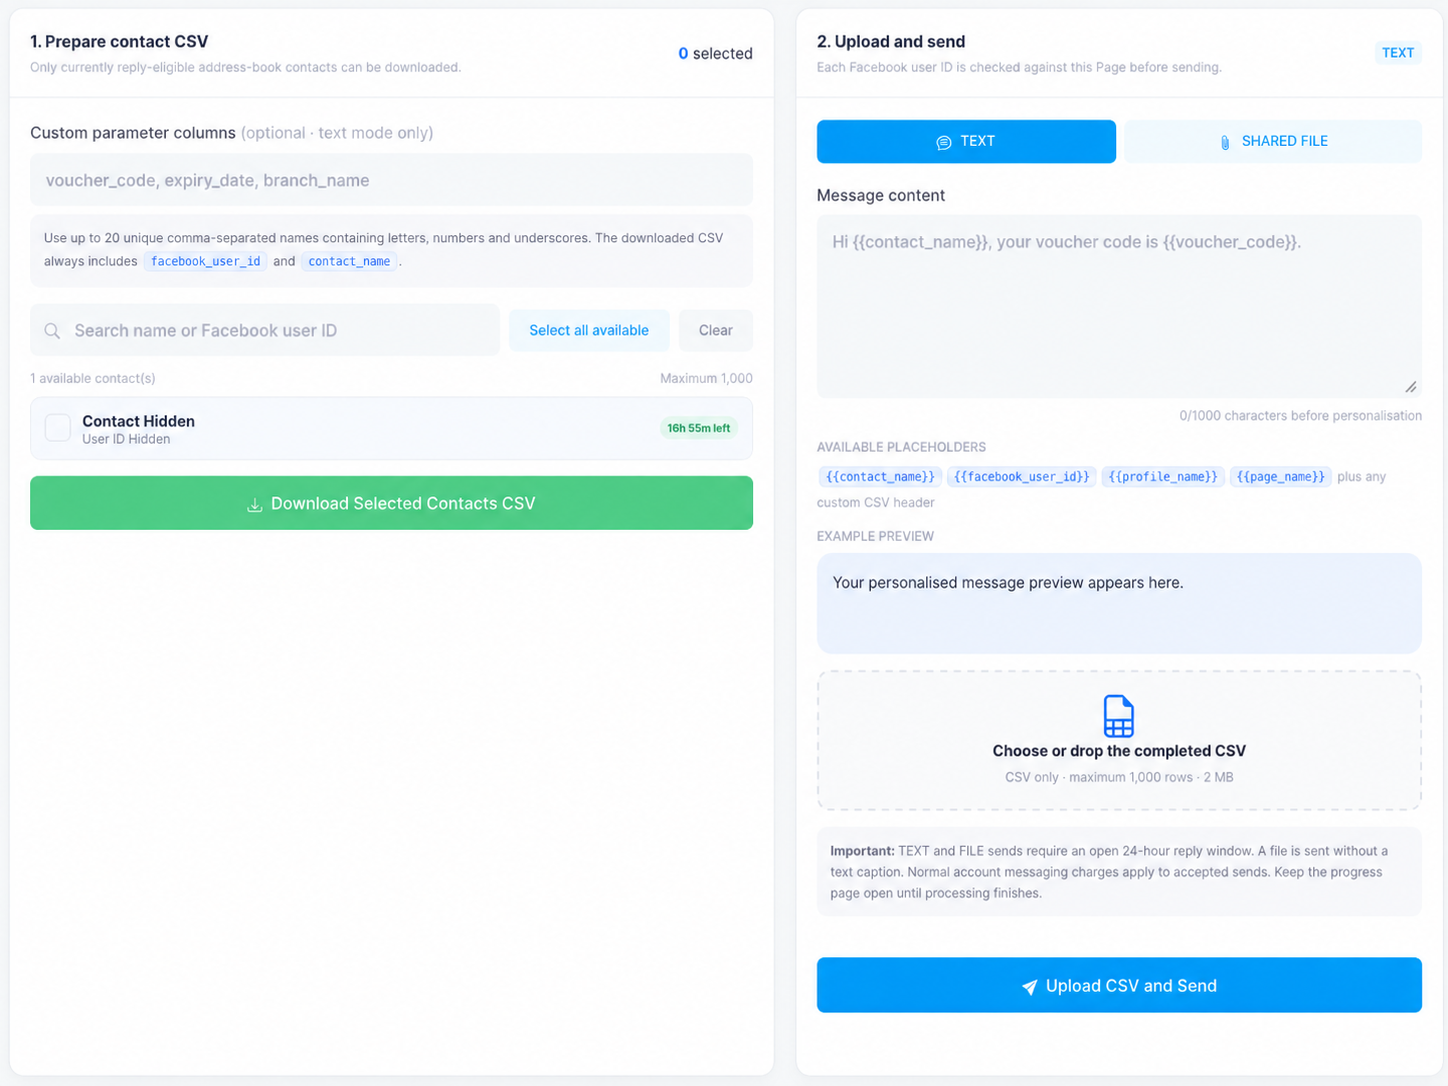
Open META Messenger → Send CSV and choose the Facebook Page. Only currently reply-eligible address-book contacts can be downloaded — each shows its remaining reply window. Search, tick individually, or Select all available (maximum 1,000).
- 2
Add custom parameter columns (optional, text mode)
Type up to 20 unique, comma-separated column names — letters, numbers, and underscores only:
voucher_code, expiry_date, branch_nameThe downloaded CSV always includes
facebook_user_idandcontact_name, plus your custom columns. - 3
Download and fill it in
Click Download Selected Contacts CSV, open it in Excel or any spreadsheet tool, and fill your custom columns with each contact’s values. Don’t change the
facebook_user_idcolumn — it identifies the recipient.
Upload and send
- 4
Write the message with placeholders
In TEXT mode, compose up to 1,000 characters using placeholders that fill in per contact —
{{contact_name}},{{facebook_user_id}},{{profile_name}},{{page_name}}, plus any custom CSV header:Hi {{contact_name}}, your voucher code is {{voucher_code}}.The example preview shows the personalised result. Or switch to SHARED FILE to send one attachment to every contact instead.
- 5
Upload the completed CSV and send
Drop the finished file into Choose or drop the completed CSV (CSV only, maximum 1,000 rows and 2 MB) and click Upload CSV and Send. Every Facebook user ID is checked against the Page before sending — keep the progress page open until processing finishes.